Best Fence Stain


STEP 1 CLEAN/STRIP | STEP 2 BRIGHTEN | STEP 3 STAIN
- Protects wood fences from damaging UV rays
- Available in 5 beautiful semi-transparent fence stain colors – Driftwood Gray, Natural, Cedar, Light Walnut, & Dark Walnut
- Stain & Sealer: use on all wood types
- Water-based, easy cleanup, dries to a flat, natural looking finish
- Covers 100-150 sq. ft. (2 coats wet-on-damp)
- 3 year warranty on vertical surfaces

Description
Whether you’re looking to increase the market value of your home or looking to make your fence last for years to come, it’s important that you protect your exterior wood from deterioration. When it comes to fence stain and sealer, there are a lot of options available, and it can be hard to know which one is the best fit for your deck. #1 Deck Premium Fence Stain is a state-of-the-art fence stain and sealer that will keep your wood fencing healthy, strong, and beautiful.
When choosing a wood fence sealer, you’ll want to make sure that you choose a color that fits with the scheme of your home and landscaping. Our Fence Stain is available in natural, cedar, light walnut, dark walnut, and driftwood gray. The most attractive fence is natural looking, and we bring out the original beauty of your fence with our semi-transparent stains. When you apply our wood fence stain and sealer, it’s not going to look as if you painted or dyed your fence. You’ll see the beauty of the original wood, enhanced to the way it looked when it was brand new.
To make your wooden fence last, it’s important that your wood is protected from harmful UV rays. The sun’s rays can speed up the discoloration all too common with older fences. Our sealer acts as a sunscreen for your fence, keeping it safe from deterioration and discoloration caused by the sun.
Product Description: #1 Deck Premium Fence Stain
#1Deck Premium Semi-Transparent Fence Stain is an advanced, water-based, semi-transparent stain formulation designed to penetrate deep into wood pores for maximum protection and longevity. #1 Deck protects wood from harmful UV rays and damage caused by water penetration. #1 Deck is safe to use, has a low odor, and is easy to clean up with soap and water.
Different semi-transparent wood stain colors
#1 Deck Premium Fence Stain comes in five beautiful colors:
- Natural
- Cedar
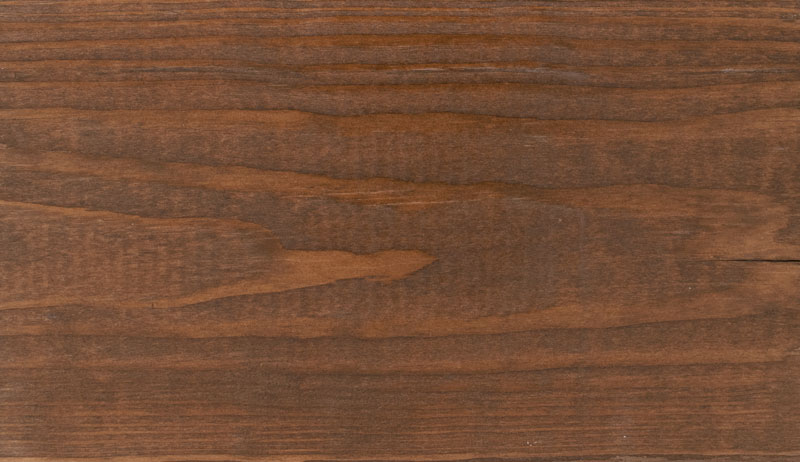
- Light Walnut
- Dark Walnut
- Driftwood Gray
When to Use Fence Stain
Step 1: Clean/Strip | Step 2: Brighten | Step 3: Stain
This product is step 3 of a 3-step process. Before staining, be sure to first clean or strip the wood. Clean if the wood is new or the previous stain is no longer present. Strip if the previous stain is present. Also be sure to brighten the wood to prepare the wood for stain.
Where to Use Fence Stain
#1 Deck Premium Fence Stain is intended for all types of weathered, exterior, wood surfaces including fences, siding. It can be used on pressure treated fencing, cedar fences, pine fences, rough sawn cedar, smooth cedar, redwood, mahogany, and more.
How to Use Fence Stain
Summary:
- Protect the surrounding area.
- Strip or clean, then brighten wood.
- Mix the stain well.
- Apply using a low pressure pump-up sprayer, or airless sprayer.
- Apply two coats on fencing and siding, waiting no more than 20 minutes between coats.
- Clean all materials immediately after with soap and water.
Full instructions:
New wood?:
Allow new wood to weather for 3-6 months.
Clean wood:
Step 1: Clean wood with #1 Deck Wood Cleaner. Rinse wood thoroughly with a garden hose or pressure washer (max.1200 PSI).
Brighten wood:
Step 2: Brighten and neutralize wood with #1 Deck Wood Brightener and rinse thoroughly with a garden hose.
Note on oily wood types:
For oily wood types, such as cedar or redwood, we recommend allowing the wood to weather for 1 year to improve penetration.
Limitations for hardwoods:
This product is ideally suited for softwoods. While it can be applied to hardwoods such as mahogany, ipe, or similar exotic hardwoods, you should plan on more frequent maintenance coats when applying to these wood types.
Weathered or gray wood:
Step 1: Clean wood with #1 Deck Wood Cleaner and rinse thoroughly with a garden hose or pressure washer (max. 1200 PSI).
Step 2: Brighten and neutralize wood with #1 Deck Wood Brightener and rinse thoroughly with a garden hose.
Previously stained wood:
Do not use #1 Deck Fence Stain over solid stains, painted, or varnished surfaces. These surfaces must be stripped prior to application of the product. If the previous finish is a solid stain that cannot be removed entirely, consider using #1 Deck Solid Color Wood Stain as it can be applied over top of other solid finishes.
Step 1: Strip wood with #1 Deck Wood Stain Stripper and rinse thoroughly with a garden hose or pressure washer (max. 1200 PSI). #1 Deck Wood Stain Stripper is effective on weathered semi-transparent or clear stains.
Step 2: Brighten wood with #1 Deck Wood Brightener and rinse thoroughly.
Weather:
45ºF and 95ºF. Avoid application of product when the daily low is below 45 or when rain is expected within 12 hours. Do not apply in direct sunlight or if boards feel hot to touch.
Damp wood:
#1 Deck Fence Stain can be applied to damp wood that has been rinsed after the cleaning and brightening process. While damp boards are ok to stain, ensure the boards are not completely saturated with water. We recommend allowing the wood an hour or two to dry out after cleaning/brightening, and rinsing before proceeding to the staining application.
Mix well:
Stir well before and periodically during use. Do not dilute.
Protect adjacent areas:
Use plastic, cardboard, and/or drop cloths to protect all adjacent non-target surfaces such as concrete, windows, masonry, plant life, etc… from overspray/runoff. Immediately remove overspray from non-target areas with soap and water before it dries.
What equipment to use:
Hand brushes should be high quality nylon or polyester. If using an airless sprayer, use tips between .011 and .015, and use the lowest pressure that achieves a uniform spray pattern to minimize fogging and overspray. When spraying, always back-brush. This ensures a uniform application, and breaks the surface tension of the wood for better penetration of the stain.
Application:
Apply stain to fences and siding beginning at the bottom and working your way to the top. Apply two wet-on-damp coats, waiting approximately 20 minutes between coats. Do not over-apply stain. Brush product into surface with a brush. For this step, a car wash type brush works well. Work out all drips before product dries. To avoid the possibility of peeling, only apply as much stain as the wood can absorb. Thoroughly coat the ends of boards to prevent water penetration.
Coverage:
100-150 sq. ft. per gallon (for 2 coats) depending on surface porosity & application method.
Dry time:
Stain will be dry to touch in 1-2 hours. A complete cure of the coating is 24 to 48 hours at 65º F and less than 50% humidity.
Maintenance:
As the wood begins to look weathered or at the first signs of graying, clean the surface with #1 Deck Wood Brightener and then apply a single maintenance coat of #1 Deck Fence Stain.
Cleanup:
Clean tools immediately after each use with soap and water.
Advantages of #1 Deck Fence Stain
- Both a stain and sealer for your wood
- Protects wood from damaging UV rays
- Available in 5 beautiful semi-transparent finishes – Natural, Cedar, Light Walnut, Dark Walnut, & Driftwood Gray
- For use on all wood types
- Dries to a flat, natural looking finish
- Water-based, easy cleanup
- Low VOC content (<50 g/L)
Frequently Asked Questions (FAQ)
Q: What’s the best way to apply a fence stain?
A: You’ve got options. Some people prefer to use a brush, others use a paint roller, while others prefer a low-pressure sprayer. It’s all about what makes the most sense for you with the equipment you have available. We have found the easiest and fastest way to stain a fence is with either an airless sprayer, or a pump-up garden sprayer, followed by back-brushing with a car wash type brush. Back-brushing ensures the stain gets forced into the wood pores, which will lead to a longer lifespan.
Q: How often should I stain my fence?
A: No stain lasts forever. As a rule of thumb, it’s a good idea to re-stain your fence every three to five years, to ensure that the wood does not get damaged by UV rays, or mold and mildew.
Q: How many coats of fence stain should I apply?
A: With #1 Deck Fence Stains, we recommend applying two coats.
Q: Does weather affect how or how often I should stain my fence?
A: Harsh weather conditions can shorten the life of a fence stain. Our stains are made with high quality resins to last longer than competitive products, but you should keep an eye on your fence if you live in an environment subject to extreme weather conditions. When you start to notice the first signs of wear, it’s time for a maintenance coat. Applying maintenance coats is an easy way to keep your fence in top condition.
Q: What can I expect the first time it rains on my newly stained fence?
A: After you’ve applied your stain to your fence, you’ll notice that water doesn’t soak in like it used to. Water beading droplets will run off of your fence – no more water soaking into your wood, creating mold and mildew in tough to clean areas.
Specific Projects
Fences
Thinking about using wood stain on a fence? We recommend using a pump-up sprayer, or airless sprayer, followed by back-brushing. Back-brushing helps even out the stain and absorb better. It breaks the surface friction and allows the stain to penetrate evenly and more completely. The stain is water based, but it’s still important to protect grass and any other plants nearby or underneath your fence. Cover up plants and be sure to rinse away any excess stain when you’re finished.
Brand new wood
If you’re working with brand new wood, it’s important that you wait 3-6 months for the wood to dry out before applying a stain. Applying too soon can interfere with the wood’s ability to absorb the stain. If your brand-new wood is an oily wood type like cedar, you may want to wait even longer- up to a year. Oily wood takes a long time to dry out and applying a stain to a wood that isn’t dry won’t let the stain set into the wood.
Wood furniture
Working on a deck or piece of furniture that has been previously stained? While it’s completely possible to give old wood a brand-new look, it’s important to make sure that you’re working with only the old wood- not the old stain. A stain stripper is an important part of preparing old wood to be stained again. Be sure to remove all traces of the old stain before beginning the new stain process.
Manufacturer
SaverSystems
800 S 7th St. Richmond, IN 47374
800-860-6327
1deck.com
For more information, see the data sheet for #1 Deck Premium Fence Wood Stain.
Note: Due to variations in computer monitors and printers, the colors shown may not match the actual color. Additionally, the actual and perceived color of stain that has been applied to wood surfaces may be affected by factors such as absorption rates, application techniques, and the wood’s natural color and grain tones.